Monday, December 5, 2011

How to make your bedroom unique for very little money!

I have a bedroom shaped like a small box.  Nothing architecturally stunning about it.  4 walls, 2 windows and a floor.  Yawn.

When you have a large bedroom there is just so much you can do to spruce it up.  There are amazing occasional chairs that you can put in there to form a reading nook.  Or perhaps an ornate dressing table?  How about splurging on a canopy bed much as they had in medieval times?  But when your bedroom is small, you have to be far more creative.

Most designers will tell you that you need to splurge on one big dollar item and build your room around that.  I say that's great if you have $5,000 (or more) to spend on a big wonderful bed!  However, I don't.  So my solution is to snaz up what I have and improvise.  Nearly anything can be made to look far more expensive than it is if you dress it up a bit.

Dreaming of a canopy bed?  Try this trick.

Look how elegant this is! Curtain rods attached to the ceiling and heavy drapery.  That's all you need to accomplish this look!

This is so simple! Attach a curtain rod to your wall and slap on a set of curtains! As your mood or the season changes...so can your mini canopy! Works wonders for a small room with low ceilings! AND if you put a mirror behind it?  The illusion of a window will be born!

Curtain rods can be attached to the wall behind your bed OR they can be attached to your ceiling!  You can hang heavy draperies to give it drama or hang lightweight curtains to give it an airy and light feel!  And the absolute best thing about this type of canopy bed, is you can change it out at a whim.  You're not married to any particular look, style or color scheme.

So what if you're just not a canopy kind of person?  What to do?  How about a comfy "head board" that will look great and give you a cushion for those nights when you want to sit in bed and read or watch TV?  

This head board is inexpensive, comfy & easy!


For the head board above, all you need are two (or three depending on how big your bed is) floor cushions.  Try thrift stores or bargain stores.  Don't worry if you hate the looks of them when you buy them.  You can easily change that with a bit of fabric.  Get the cheapest ones you can find, recover them, hang a couple of hooks on your wall and a couple of rings on the back of the cushions and you have a head board that will give you style AND comfort!!

What always makes a room, any room, appear larger and brighter than it really is.......mirrors!

If you have a wall that perhaps isn't right for a piece of furniture due to traffic flow or maybe it's just too close to the bed or another door such as the closet, try putting a mirror there.  It will furnish that space, allow light to bounce around and give it some style and functionality all at the same time.  Let me show you a sample of a unique mirror below.....


Old doors can be found at salvage companies, on the curb, at Habitat for Humanity outlets or maybe even in your basement or attic.  This one was just a simple unadorned door from a renovation that was going to be tossed out.

All it took was some paintable wallpaper for the inset at the top, some molding to put around the inset as well as on the top and then going to the glass store to get a piece of mirror to fit nicely in the front.  Once you have your mirror, glue it in place and put a thin molding around the edges with brad nails and glue.  This will not only give it that finishing touch, but will keep it firmly in place for generations to come!  Note: do any painting before you place your mirror otherwise you just might have a mess to clean off your mirror.

As for the door knob, take it out and using a wall repair kit that comes with a plastic screen for large holes in walls, patch the area where the knob used to be.  Once it's all dried, paint and no one will ever know it was even there.

OR you could leave the doorknob if it's an unusual piece and use that to hang your purse or scarves on.  Whatever you wish!

Enjoy and have a great time trying these tips out in your own home!

Thursday, December 1, 2011

It's Cold Outside!!! Time to plug up the holes!

Unless you live in a brand spanking new energy efficient house (and sometimes even then) you are getting cold air seeping into your home from some of the strangest places.

The normal and most obvious places are your windows and doors.  But how about your electrical sockets?  Your light switches?  The spaces between your wall and your floor?  Overhead light fixtures?  Fireplace? There are numerous places that allow cold air to stream into your home.

The easiest way to discover them?  Light a candle and walk around slowly.  When the flame flickers, there's air movement.  Once you discover the source, plug it up!  You will also want to make your room as dark as possible during the day.  Then walk around your house and look for light coming in from doors and/or windows.  Easy as pie.

If you go to your local light company, most of them will give you (for free) a weather proofing kit.  It won't be enough to do your entire house, but it's free and it's a start.  Anything else you may need will be found at your local home improvement store.

Do you have a fireplace?  You would not believe how much heat in the winter and cold air in the summer goes right up your chimney.  Even when the flue is shut air still travels upward and outward.  Also, when a cold gust of wind occurs guess what comes down your chimney??

Framed print securely taped over plastic in FP opening

How about this idea?  Add mirrored tiles to cover the opening over the plastic?


Or just tilt a large framed print over the entrance in front of the plastic?
My fireplace is non-working.  It hasn't worked in years and I'm not inclined to spend the money necessary to make it functional again.  My solution?  I put thick plastic across the opening using duct tape to keep it securely in place.  Then I took a framed print that I like and I placed it in front of the plastic using a clear heavy duty packing tape to secure the frame to the opening.  It looks really nice and there is NO air coming or going up my chimney.

The quickest and easiest place to begin your weather proofing is to start with the electrical outlets and light switches.  Take the covers off and insert the foam insulators.  Put the cover back on and you have effectively stopped air from seeping into your home from that source.

What about the overhead light fixtures?  When a house settles, especially an older house, there will oftentimes be a crack or separation between the ceiling and the fixture.  Simply take the light fixture cover off and use a water proof silicone caulk all the way around the base of the fixture.  Replace the cover and you're done.

Windows and doors.  Every year you should check the sealant that holds your glass in place.  Over time, it shifts, cracks and eventually the sealant will simply fall out leaving tons of areas for air to seep into your home and heat to seep out.  Again, water proof silicone based caulk will do the job.  It dries clear and is easy to work with.  Wait until the time of day when it is warmest and the windows are dry then put a generous bead of caulk everywhere that the glass meets the frame of the window.  If you have the old thin windows, this will not prevent air from going through the actual glass but it will prevent a majority of seepage.

Let's not forget about caulking around the outside of your windows!
Some people hate drapery.  They prefer to have curtains or blinds which is fine.  However, if you are going for a more energy efficient house, draperies are the way to go.

What is the difference between curtains and draperies?  It all in the thickness and weight.  A curtain is usually made of a very light weight material and while very attractive and airy to look at, it does nothing to stop the flow of air either into or out of your home.  Draperies, on the other hand, are normally made of a heavier material and are oftentimes lined.  Hanging draperies on all windows can dramatically reduce the air seepage.  Open them when the sun is bright and then shut them when it's not.  They are usually more pricey than curtains but the savings in your utility bills will be apparent.  Another tip concerning windows.  It is far more important to keep your windows clean in the winter time than in the summer time.  Why?  Because grim, smoke build up and dirt will prevent a lot of the natural warmth from the sun from coming into your house.

Now to the doors.  There are rolls of self adhesive foam strips that you can buy at any DIY store.  They come in varying thicknesses.  The trick to finding the one that best suits your doors is to measure the space between the door frame and the door.  Even then, you might have a tough time picking the right depth for your strips.  Too thin?  Air still seeps through.  Too thick?  Air no longer seeps, but the door doesn't shut well and eventually the strips will wiggle loose and fall off.  These are not expensive so I recommend buying two sets of different thicknesses until you get the right one.

These strips go between the door and the door frame on both sides and the top.  Once properly applied they are hardly noticeable.  For the bottom of the door, I recommend buying a strip specifically made for door bottoms.  It is made of metal with a thick rubber band on the bottom.  These come in a variety of finishes (and prices) from white to black to silver to brass.   I highly recommend getting two for each exterior door.  One for the outside and one for the inside.  Be sure to place them as close to the bottom of the door as possible.  They are simple to place and you just screw them into the bottom of your door.  You will hear the rubber scrape the floor whenever you open or close the door, but they will absolutely stop airflow.  Because the part that meets your floors is made of rubber, it will not harm your floor in any way.

Let's discuss the floors/walls.  Most houses have strips of quarter round where the floor meets the walls.  This is preferable.  However, some do not and still others have the quarter round but due to the house settling, it may not have a tight fit any more.  Remember, air only requires the tiniest of gaps to invade your home.

I paint my trim, baseboards, quarter round twice a year anyway so while I'm down there, I always put a strong bead of paintable caulk where ever the floor meets the walls.  Spackling will do if you don't have the caulk.  Spackling is far cheaper than the paintable caulk as well.  The only thing about spackling is that it will shrink over time so it will be imperative that you check this twice a year.

Once you have resealed your quarter round and it is dry, paint and you're done until spring.  It's really not a difficult or expensive chore - it's just a bit time consuming.

What to do if you don't have quarter round?  Many houses don't.  Either the builder didn't see fit to do it or perhaps at one time, (as with mine) your house had carpeting and when the carpet was removed, no one bothered to replace the quarter round.  A lot of time when folks carpet their house, they don't see the need for quarter round so they remove and discard it. Bad idea.

If your house is carpeted, there's really no need to do the caulking step.  Simply buy some quarter round at your DIY store and brad nail it snugly where the carpet meets the walls.  You can buy the pre-painted quarter round which will save you from having to paint.  Just because you have carpet, it doesn't mean you are leak free.  This will also prevent the edges of your carpet from slipping and becoming frayed.  In addition to those benefits, it will give your room a finished look while it protects you from the cold air.

Outside vents.  Most people don't worry about them.  Most people get more cold air coming up from beneath their houses then they realize - because they don't worry about their outside vents.

Exterior vents serve a very useful purpose.  However, they also allow wind to flow beneath your house and up into any cracks or crannies that exist.  Something that is nice in the summer but not so nice in the winter.  Having your exterior vents open will also promote the freezing of your pipes.

Years ago it was thought that by providing crawl space vents it would ventilate the air flow beneath the house providing a more energy efficient and healthier house.  We now know that is not the case.  It not only blows air (and dust) up into your house but allows critters to take up residence under there possibly chewing on wiring or infesting your house with fleas.

There are professional grade crawl space covers on the market that are easy to install and will last the lifetime of your house.  Below is a photo of one such product.


When the first hint of cold weather hits, I go outside and securely cover every vent in the foundation of my house.  Some houses, actually have levers on their vents that will allow them to simply pull the lever causing a flap to fall.  Mine however, do not.  Since one of the best insulators is wood, I have cut thick exterior quality wood pieces large enough to cover my vents and I place a concrete block in front of it to hold it securely in place through the winter.  As I have multiple plantings next to my house, it's not even noticeable.  What is noticeable is the amount of cold air and dust that stays away from my floors.

The power company where I live told me that if I will get 10 mil plastic and have someone crawl beneath my house and cover all the ground beneath my house with the plastic, I will save up to 14% on my energy costs and cut my dusting down to nearly never!!  I haven't tried that yet but fully intend to do so.

My grandparents lived on a farm.  Every winter, when we would visit, my grandparents house would look like a big plastic box.  That's because every winter, they practically wrapped the outside of their house in plastic to keep out the drafts.  While I don't go that far, I do still cover windows in plastic.  Especially on the north side of my house.

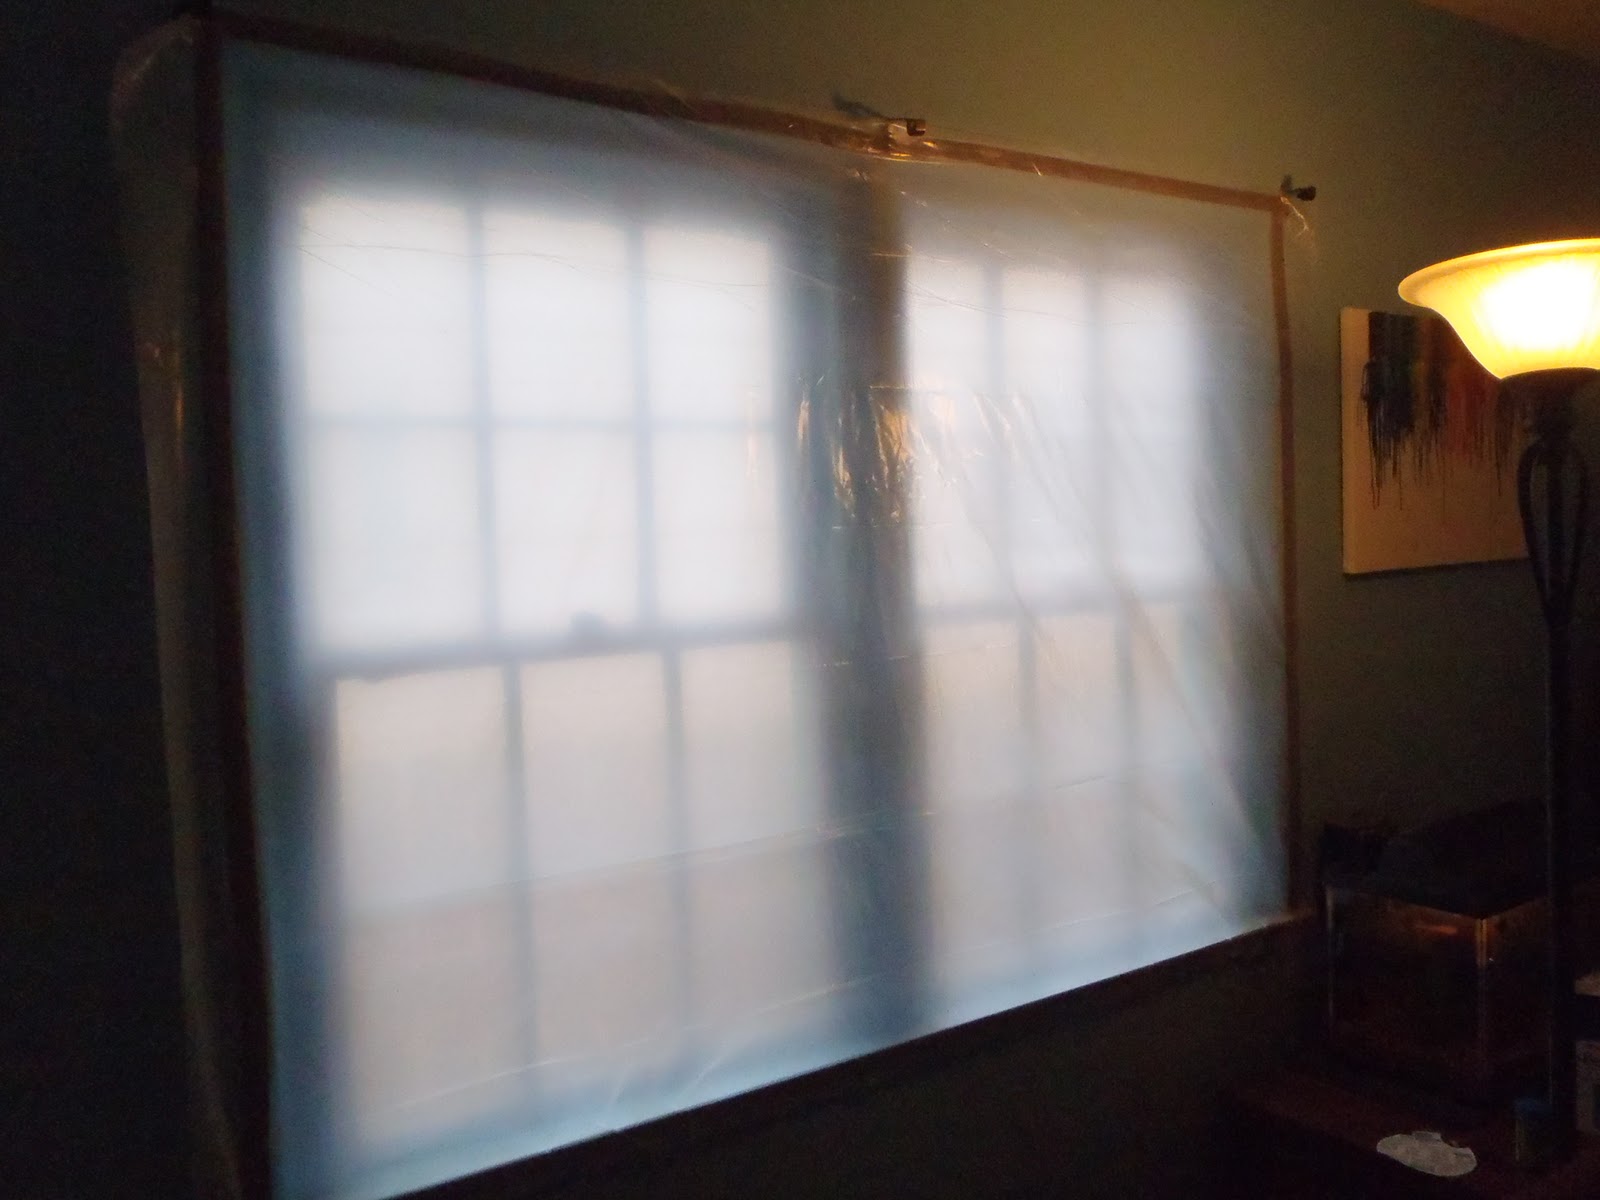
Thankfully the front of my house faces south, so I don't have to cover those windows.  But the other three sides of my house get covered in plastic.  You can get a huge roll of this plastic specifically designed for insulating at a relatively cheap price from any DIY store.  The higher the MIL count, the more insulation value it has.

While my grandparents applied it to the outside of their windows, I prefer to cover from the inside to prevent the plastic from being viewed from the outside of my house.

Once the draperies have been replaced, no one will ever know there is plastic on my windows.
Once I have sealed my windows with caulk, I cut strips of cardboard about an inch wide until I have enough to go around the window.  Then I cut enough plastic to cover the interior of my window.  I like to have it triple thick.  Starting in the top middle of the window, I place the cardboard over the plastic and begin to staple from the middle of the cardboard outward.  Then I do the middle bottom and the middle sides.  Next I fill the rest of it in, lower the drapes over it and I am finished with that window and ready to move onto the next one.  From the exterior it is absolutely unnoticeable and with my drapes closed it is unnoticeable from the interior as well.  You can leave this up all year round.  However, I like to open my windows in the spring so I normally take the plastic down once the last cold spell has passed.  By using staples, it hardly damages the window frame.  All I have to do is apply a tiny amount of spackle where the staples were and paint as usual.  Like I said, I paint all my trim twice a year anyway.

Why use the cardboard strips?  I have tried it the other way and as a result I spent a large amount of my time repairing the areas where the plastic worked its way from the staple and provided gaps.  The wind and moisture will cause your plastic to wiggle and everytime it wiggles, it will work itself a little bit more loose from the staple until it works itself free.  With the cardboard strips, the cardboard maintains a much tighter fit and also requires far fewer staples.  You can purchase the cardboard strips but I find it infinitely cheaper to take a box cutter and sit down on the floor and cut my own from boxes I got for free from the liquor store.

A long time ago, folks used to hang heavy drapery over every doorway.  That was back before central units.  Back when they used wood to heat their homes.  They would drop the draperies so that the heat would stay in the room with them.  I'm sure you've seen movies about people who lived in castles.  Look closely next time and you will more than likely see these draperies.

This is a photo of the dining room in the Neuschwanstein Castle.  Notice the heavy draperies at each doorway?
My grandmother did this.  She chose thick draperies and she placed a rod above each door and doorway. At night, she closed the doors and pulled the draperies closed.  It provided wonderful added insulation.

I have not gotten that diligent in my insulating habits yet, but I am contemplating it.

Aside from the obvious money saving and warmth retention that insulating your house provides, dust control is an added bonus.  If air can seep into your home, so can dust and dirt that is blown into your home from beneath your house or from your yard.  If you adequately insulate your house, your need to dust will dramatically drop.  That's always a good thing in my book!

I hope this has given you food for thought and that you stay warm, snug and dust free this winter.

Tuesday, November 22, 2011

Tired of your doors?

My house has the original front door from 1957.  It is a solid wood door, in very good shape and very sturdy.  However, it is NOT my taste and I feel it severely dates the house.  I have painted it white, red and even tried to make it blend in (and go away) by painting it a very dark charcoal.  Nothing worked.  It still screams 1957!

I had thought about replacing it, but to get a solid wood, heavy entrance door (that I liked) it was going to run me at least $1,000 (including installation).  That option went out the window!

Then I started browsing the internet.  I found wonderful doors that were clad in copper tiles, tin tiles and even some that had been clad in wood.  I'm onto something here!

It's not as difficult as one might think to clad a door.  First you have to decide on the material.  Do you want copper?  Copper weathers well and eventually has a very nice patina if left undisturbed.  Nice.  Tin works in a similar manner and is considerably less expensive.

Your decision should be based on several things.  First, how much money do you want to spend? Second, how artistic are you?  Third, what would work best with the style of your house?

Wood can really transform a door.  However, be wary of using wood that is too heavy because it will add so much weight to the door that it will sag.  Also, if your wood is too thick, it can make the door not fit properly.  Something to think about.

People have been inserting tin and copper tiles into their cabinets for generations.  Why not do it to your front door?  The hard part is choosing the panel that you love the most!  Then all you have to do is measure and mark where you want them to go, apply a thin coat of glue (make certain that the glue is formulated to adhere metal to wood). Then add a few brad nails around the edges of the panel to firmly secure them in place.  The last 2 steps are to place the molding of your choice over the edges of the panels and then stain or paint.  Because the tin/copper panels are so thin, there's no need to cut into your door in order to install them.  The molding will make them appear recessed into your door. The results will astound you and garner you compliments from everyone who sees it!!

These are kitchen cabinets with tin inserts.  Imagine how beautiful this would look on your entrance door?

This is an old pie chest with tin inserts.  I think a front door like this would give the entire house character!

This door is clad in copper panels that have been cut to irregular shapes and completely cover the door.  Stunning effect!

How about cladding your door in a nice wood?  Let's take a peek at how that might look!

This is a simple wood clad project.  The center of the panels appear to be windows or mirrors but they are actually strips of aluminum such as you might use for flashing.  Remember to use a light wood and to adhere the aluminum before you add the wood.


If your door is already solid and in good shape, maybe all you want to do is add molding to it and a new paint color.

Another door that was transformed by the simple use of molding.

Are you artistic? These fabulous doors appear to have metal inserts.  However, the designer simply carved the designs and painted with a metallic finish.  One of a kind.

Hopefully this post has opened your eyes and broadened your sense of what you can do with your front door.  In this economy sometimes it's just not prudent to go out and purchase a brand new door.  None of these doors will break the bank or even cost as much as a new door.  However, each of them will make your house unique, charming and immediately leave a lasting impression on all who see it.

The best part about revamping your door (besides the ton of money you will save)?  Every time you approach it you will smile and feel a sense of pride in your accomplishment.

Now go make your door gorgeous!!

Friday, September 2, 2011

Is storage an issue with your home?

My home is seriously short on storage.  It is also seriously short on uninterrupted wall space.  My previous home was a 4 square built around 1910.  Big rooms with tons of wall space.  The longer I lived in that house, the more family photo's I framed and hung.  The more artwork I bought to adorn the walls.  However, that was an issue when I moved into this house.

I tried buying shelving units to house all my pictures and dust collecting objects that I just couldn't do without.  That just took up more floor space and made the rooms feel far smaller than they were.

My solution?  I added shelving between the wall studs!  This was a very messy project but a very attractive solution!  It takes up zero floor space and adds life to an otherwise blank wall.

Here are some examples.  Below the photo's I will give you step by step instructions.
While the depth of your shelving depends entirely on the depth of your wall, these shelves will nonetheless add storage for things that would otherwise take up either floor or counter space.

These shelves live in my rather narrow hallway.  I made two of these and have since painted them white to match the trim in the house. (I have also replaced these items with family photo's).

Here are other areas in which this project is useful.


  • Kitchen:   Great for a kitchen pantry or shelving for spices. Makes a nice niche to display decorative plates.
  • Bedroom: Great in the kid's room to house pictures or small toys
  • Bathroom: Best way to get the razor's, hair spray and other assorted products off the counter that I know!
  • Den/Living Room: There is no better way to get those family photo's  or treasured knicknacks in plain sight without taking up valuable floor space.


Now that you've seen the completed projects, let's get on to how to do this in your home.

Bear in mind that you can only have the width and depth that your house will allow.  The first thing you have to do is find a wall that you want to rip into.


  1. Find the studs in that wall and mark each stud with a thumb tack (or you can use a sharpie and clean up afterwards).  Then taking your hammer knock out the sheetrock between the studs.  NOTE: try to be careful during this process for two reasons. First, you don't want to knock into any electrical or plumbing that might be hidden in the wall and secondly, you don't want to damage the sheetrock that covers your studs.  I chose walls that didn't have any electrical outlets on them to minimize the risk of finding electrical wires.
  2. Once you have knocked away enough sheetrock to expose the area between the studs, take a sheetrock knife (I actually used a large serated knife typically used to cut ham) and trim up the edges.
  3. At this point there are two ways to continue.  You can either build a box that fits tightly into the opening or you can use the existing studs and back wall as your box.  If you choose to go this route, all you will have left to do is install the shelves, paint and trim it out!
  4. If you go with the first option, there will be extensive measuring and cutting to do.  The end result will not vary greatly from option number two.  However, with option 1, if you are off in your measurements, you will have to recut, renail and try again.  I don't know about you but I'm not good enough with this type of precision, so I chose to go with option number two and build off what was already there.
  5. One issue you might have with the second scenario -  you have to make sure that the studs butt up against the back wall for this to work.  If it very nearly butts up, you can still use this procedure but you will need to apply paintable and waterproof caulking to fill in the gaps otherwise your cool air in the summer and warm air in the winter will escape quite easily.  Gaps will also allow critters such as spiders easy access to the interior of your home.  To me the most important reason is because if you don't close up the gaps - it just looks ugly!  Once you have applied caulk and painted, no one will ever be able to tell - promise!
  6. Once you have opened your space and trimmed up the sheetrock, wipe the area clean and paint.  I like to use the same wall color for the back board and studs and then paint only the trim white.  It gives it a lot of depth.  However, if you paint the entire area white will make it pop!
  7. While the paint is drying, begin to cut your shelves.  I used regular MDF (medium density fiberboard) for my shelves. NOTE: MDF should never be cut indoors!  Also, when knocking in the wall always turn off the HVAC until you have gotten rid of all the dust or it can and will clog up your filter.  I like to use MDF because it's cheap and since I'm not going to be putting anything heavy on the shelves, it will hold up really well.  If you are going to have 3 shelves you will still need to cut 5 pieces.  3 for the shelves, 1 for the top of the area and one for the bottom to close up the gap.  I then used plain, cheap quarter round to make my shelf supports.
  8. When you go to the lumber store to get your lumber, don't be afraid to take your measurements with you and get them to do all your cuts for you.  Each store varies but most will give you a couple of free cuts when you buy the lumber and will charge you a nominal fee for any additional cuts that you want.  I had my MDF cut for the shelves but cut my own quarter round and trim.
  9. While you are there, pick up your trim.  I used a plain corner trim for the sides of the opening and also for the front of the shelves.  As the name suggests, corner trim is typically used on corners.    I then picked up trim that matched the existing trim in the hallway to put at the top and bottom of my unit.  Tip.  Before you go to the lumber store, take a photo of the existing trim and take that with you when you shop for the trim for your shelving project.  Another tip.  You can purchase trim that is already primed.  This cuts down on the painting part of this project and normally it only costs a few pennies more than the plain wood.
  10. Once you have everything cut and ready, use brad nails to attach the quarter round inside your unit to act as a support for your shelves.  Make sure the flat part is facing up so you can sit your shelves on top and that each side is exactly the same distance otherwise your shelf will tilt.  Also, make sure the piece you have cut is wide enough to give amble support to your shelves but short enough that it doesn't interfere when you are trying to put your side trim on.
  11. The first shelves to install should be the top and bottom that will serve as the interior top and bottom of your unit.  Attach supports just below the sheetrock on the bottom and then set the shelf on top.  For the top part put the supports as close to the opening as possible allowing just enough room to put your shelf in.  Then continue to the rest of the shelves.
  12. Don't worry about nailing the shelves onto the supports.  If you have cut your shelves to fit snugly into the opening, they will sit there without wobbling.  Also, should you decide to place something tall in your unit later, you can always take a shelf out if it's not nailed into the support.
  13. Once you are satisfied with the placement of your supports and the shelves, it's time to do the trim.  The corner trim is awesome on this project because it covers the edges of the sheetrock where you have trimmed it and it gives it a wonderful finished look.  After the corner trim is applied to the sides of your opening, attach the top and bottom trim.
  14. Now that the unit has been completely assembled, it's time to grab the caulking gun.  Look for any spaces between the shelves and the back wall or studs, gaps between the trim and the wall, etc.  Give each space a good bead of caulk and then smooth it flat.  Allow 24 hours for the caulk to completely dry.  Then paint and enjoy the fruits of your labor!

This is one of the easiest and most rewarding projects that I have ever done.  I absolutely smile every time I walk past it!!

Tuesday, August 30, 2011

Cluttered Houses (part two)

I touched on the challenges when a cluttered house is listed for sale in my last post.  Now I'd like to dig a little deeper into the subject.

When a potential buyer walks into a house, they don't need to be distracted. Clutter and other personal items distract a buyer's eye.  If a buyer has to be careful where they're walking because of the clutter, they are looking down rather than noticing the beautiful molding and high ceilings.  They are watching their step rather than seeing the marvelous windows and the view beyond.  They are smelling the odor of accumulated dust and last night's dinner.

When you have your house on the market, you should adopt the attitude that your house is no longer yours.  It should already be decluttered, cleaned and personal items edited before the listing agent arrives to take the listing photo's.  The yard should be well manicured, the walkways clean and the entry inviting.  Remember, most prospective buyers will drive past your house before ever asking to view the interior.  If the outside looks poorly maintained, they will assume the interior is in even worse condition and will just keep on driving.

The day of the viewing, visit each and every space in your house.  Beds made? Dishes off the sink and counter? Toilet and bathtub clean? Garbage out of the house? Curtains wide open? If you have the time and the weather is permitting, open all the windows you can to allow the house to refresh itself.  Allergies are an ever growing problem these days and sometimes perfuming a house can back fire.  There are a lot of folks out there who are allergic to many air fresheners, incense and the like.  Also, if a house is overly perfumed, buyers will often wonder what the homeowner is trying to cover up?  Cat not like to use its litter box? Problem with mildew or mold?

As stated above, you want the curtains wide open at a showing.  This allows natural light to flood into the house which makes every space appear cleaner, fresher and larger.

Get rid of very taste specific items in your house.  You don't have to throw them out.  Box them up and put them in the basement, attic, garage or even rent a storage unit.  You're going to move as soon as the house sells anyway, so might as well get a jump on the packing, right?  Those African masks hanging on your wall may make you happy whenever you see them but for many, it might be frightening and while they may forget that you have beautiful hardwoods in that room, they will never forget that you had those masks on the wall.

Let's dissect some photo's of actual properties that I found listed for sale.
  This bedroom is atrocious.  The bed's not made, there is clutter everywhere, a water bottle is on the nightstand, the closet is not only over stuffed but has no doors and they have taken a corner of the room and transformed it into an office.  Let's not forget the dirty laundry on the bed.

On closer inspection, this room appears to have lovely hardwood floors and a nice modern ceiling fan. However, you have to look hard to notice them with the current condition of the room.

What this room tells me is there is not enough space in this house for an office, there is not enough storage otherwise the closet would not be overflowing and the owners aren't very clean.  Let me expound on the "owners aren't very clean" part.  When you invite an agent to take photo's of your home to put on public websites where millions of people have access to view the interior of your private space, you are going to want to put your very best foot forward, right?  If this is your housekeeping at its very best, what is your everyday housekeeping like?

When selling your home clear out every single piece of clothing that you don't wear on a weekly basis, pack up the winter clothes/shoes if it's warm weather, invest in a nice neutral comforter set and by all means get everything out of the bedroom that is not actual bedroom furniture - yes, that includes the desk/computer. You want your bedroom to appear as spacious and light filled as possible.

Lastly, I can just about guarantee that this room smells badly.  Anytime, you have closed blinds, dirty laundry and open containers of food in a small unventilated space, you are going to get unattractive odors.  Especially if the room is carpeted and most certainly if the owners smoke.

Next, let's look at a living room that while not overly cluttered is overly furnished and poorly decorated.
You may ask "What's wrong with this room?  It's not dirty."  No, it's not dirty but it is visually cluttered.  This is not a large room by anyone's standards but it appears half the actual size because the homeowners have filled it to the brim with stuff.  To make matters worse, the stuff in this room is not to scale with the size of the room.  The ceilings aren't high to begin with so don't overfill the room as it makes the ceilings appear lower.

This is indeed a small room and nothing you do can make it appear huge.  However, you can maximize the footage in this room and make is appear larger than it really is just by editing out the overscaled furnishings.

Again, rent a storage unit and take at least half of these things out of the room and into the unit.  While most stagers loathe TV's, I am of the opinion that TV's need to stay when staging.  There are people who don't own TV's, but they are certainly the minority of people in this country.  Owning a TV is not an oddity these days.  Owning just ONE TV is.  With this in mind, I always like to leave one TV in the house because I realize that when a potential buyer walks through the house, they will look for things such as "where will I place my bed?" or "Where will the couch go?" or "Where will we put the flat screen?"

I would leave the sofa, TV and the small plant stand.  Then I'd bring in a smaller occasional chair, a mirror to bounce the light around and open the blinds to give this room as much light as possible.  Remember, just because you paint your walls white - it doesn't mean the room looks larger.  Sometimes the room just looks bland.  Since it's a small room, paint it a nice light neutral color with a large LRV number.  (LRV stands for "light reflective value" - the higher the LRV number, the more the paint color will bounce natural light).

Most people have a "mystery" room.  Usually it's a small bedroom that we don't use.  This room collects everything that the homeowner either doesn't use much (Christmas decorations, stuff the kids have outgrown or - in my case - even stuff the kids just haven't gotten around to getting out of your home once they move out).  If your house isn't on the market - no big deal - you simply keep the door closed and no one is the wiser.  However, once your house goes on the market, this room must have a better identity.  A 3 bedroom house sells for significantly more than a two bedroom plus a junk room house.  Take a Saturday and armed with garbage bags and boxes, sort through this stuff until the room is clear.  You will probably discover that most of this stuff can go to the curb.  Slap a fresh coat of paint on the walls, vacuum the carpet and voila!  A bedroom has been born!

Where do I begin on this photo?  Not only is it cluttered to an inch of its capacity, but it is horribly decorated.  Again, take a weekend out of your life and address this room!  Take EVERYTHING out and don't bring back the family photo's, keep only a dozen (maximum) of the books and/or video's.  If you just have to have the desk in that room, move it away from the window, strip the wallpaper off the walls and paint and by all means, get rid of the granny curtains and the fake flowers above the window.  NOTE: Fake greenery isn't fooling anyone.  It's just collecting odors and dust and dating the entire house.  Since fake greenery went out in 1990, potential buyers will wonder what else hasn't been updated since 1990.

Next post?  How to update and decorate on a shoestring budget.........

Think it's okay to list your house when it's cluttered?

These days "stuff" is all to easy to accumulate.  There are online sites offering free shipping and cheap prices.  Catalogs galore.  "Big box" stores offering great deals in bulk and massive chain department stores that allow for incredible bargain prices. 
We have expanded the idea of basic needs well beyond necessity. Needs are things that we cannot survive without such as food and shelter. For whatever reason, many of our desires have become needs and the result is too much stuff. In a society where shopping has become a recreational sport, and the acquisition of things a daily ritual, we must be cautious not to acquire too much to clutter up our homes.
Many people who live in cluttered environments have developed some numbness to the condition of their homes, meaning that they truly no longer consciously notice or see the chaos of clutter. 
From the prospective buyer’s viewpoint, clutter translates into an undesirable home. Cluttered homes appear smaller. They look darker, and tend to smell from the excess dust. The visual stimuli of a cluttered home can be an immediate turn-off because the combined effect suggests that all of the home’s other features will be rundown, decayed and in need of much repair.  A prospective buyer will immediately think the house is nasty and cannot imagine themselves ever bringing their personal items into the home, much less ever actually living in the house.   That first impression will forever be etched into their minds and the house will remain as a symbol of filth to most potential buyers. 
The opposite is also true: homes devoid of clutter and kept clean give the impression of being well maintained and not requiring much work.

It is important to understand that when prospective buyers view a home they do so through various lenses. Some will look at a property in terms of its resale value, others will view it as a starter home, and others will view it as their potential home for life.
For those looking at property in terms of resale value, clutter is a good. Clutter means that the property doesn’t show well and as such the potential buyer stands a good chance of acquiring it below value. For those looking at a property as a starter home, the clutter only serves to widen the gap between the desired home and the home they must settle for. People looking at a property as their potential permanent home will imagine themselves occupying it. Clutter compromises the ideal image and prospective buyers view the home in terms of cleaning and maintenance.

Properties with clutter translate into increased time on the market and lower values, not only because the clutter decreases the perception of size, air and light, but also because of the perceived level of work involved in maintaining the property. It might behoove sellers to spend a little upfront and hire a professional clutter clearer and/or home stager. This initial cost will be recouped by way of a higher selling price and faster sale.
It never ceases to amaze me when I'm trolling the real estate sites to see houses listed with photo's that clearly show the house at its worst.  Many buyers can look past outdated things that can be changed.  Shag carpeting or orange laminate countertops can be ripped out and replaced with more modern finishes.  Flowered wallpaper can be stripped off and replaced with paint or a more taste specific wallpaper.  But when I see that an agent has posted interior shots of a house cluttered with dirty dishes in the kitchen sink, beds unmade, dirty laundry strewn about, etc., the first thing I think is "WHAT WERE THEY THINKING?"
If an agent lists a cluttered, messy and potentially dirty house for $100,000, there is precious little chance of them actually getting that price unless the house is in a prime location worth 3 times that amount.  But if an agent gets their client to spend an hour of their time to clear off the kitchen countertops, make their beds and do some general pick up before photo's are taken, the homeowner will come much closer to getting their asking price.  
As an agent, you are a consultant for your client.  You need to go into the house with the eyes of a potential buyer.  You need to instruct and educate your client as to what they need to do in order to get a full price offer in a reasonable time.  Anything less than that is a true disservice to your client.
There was a time when the real estate market was thriving and it was truly a seller's market.  A cluttered house may have flown during those times.  However, in today's market, it's all about the buyer and buyers are  not inclined to purchase a cluttered house when they can go down the block and get a clean one for the same price or lower.